Easy Tips Painting Rhode Island Walls
1. Prepping the room
More time will be spent preparing to paint than actually applying the coats. It pays off — good preparation will save you from dealing with hiccups.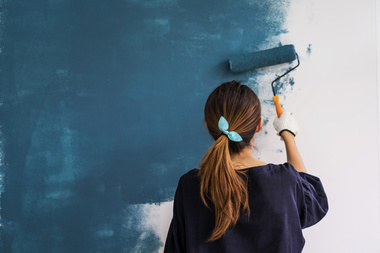
- Remove everything you can from the walls and doors, including doorknobs and electrical outlet faceplates.
- Wipe your walls clean; dirt and oil prevent paint from bonding with the wall.
- Use cotton instead of plastic drop cloths — plastic is slippery to walk on and leaves paint wet and easily tracked around the house.
- Mix all the paint in one big bucket to even out any slight variations in color from can to can. You can always pour the paint back into the original cans if you have too much.
2. Taping, to make it easy
While still technically preparation, taping is crucial to keeping your paint neat and professional-looking.
- Apply the tape in short, overlapping strips where walls meet, on the side you want to protect.
- Plan to paint the trim first, the ceiling second and then the walls. It’s easier and faster to tape off the trim than the walls, and any blobs of paint on the walls can just be painted over.
3. Primer, your invisible friend
Primer is a no-skip step; it helps your paint bond to the wall and covers up any stains. When you’re drastically changing the color of your walls, tinted primer can be a necessary bridge in taking that tone where you want it to go.
- Start by outlining a small part of the room with primer, painting two-to-three-inch bands around any feature like windows or walls. This is called “cutting in.”
- For a seamless look, start painting the wall while the area you painted in the cutting-in phase is still wet; that way, the sections blend.
- Take the wall in manageable chunks, using a paint roller to paint the primer onto the wall in V- or W-shaped strokes.
- Don’t paint your roller dry! Keep it wet to keep the paint on the walls wet — then you can “work on a wet edge” or overlap the wet paint for a smooth application.
4. Painting (finally)
Painting will use a technique similar to that used with the primer. Wait until the primer is dry, then get painting!
- Don’t cut into the wall — begin painting on the wall and paint next to the tape only when your roller is almost dry.
- Paint in V- or W-shaped strokes. When you finish a small section, use the last paint on your roller to do a finishing stroke from top to bottom to smooth out any roller tracks.
- Once the paint is dry, remove the painter’s tape by cutting it from the wall with a knife and pulling it at a 45-degree angle.
Painting is a big job, but it’s very manageable and cost-effective with the right techniques under your belt. Don’t be afraid to dive into deep green or fall into fuchsia!
